NOTIFICATION WORKFLOW:
BUFFER SEARCH, ADDRESS LABELS & MAIL MERGE
|
Local Government Help > Documentation > Notifications
|
|
A common workflow in local government is creating a buffer around a property, linear feature (sewer line), or a custom boundary (city block) to notify residents of a proposed change, construction, or upcoming event. This document describes the workflow for creating a buffer search, creating address labels or submitting the address labels to mail merge.
Note: This document will be separated into three separate documents which together form the Notification Workflow. The three documents are Buffer Search, Address labels and Mail Merge.
|
Buffering a Property
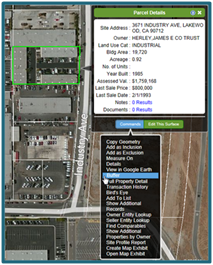
- Click the property on the map that you intend to be the center of your buffer search.
- Click on Commands at the bottom of the Parcel Details window.
- Click Buffer/Notification in the menu.
- Enter the Buffer Distance and the Buffer Units.
Tip: The Buffer Distance will be set by default to 300ft.
Note: The Buffer Distance is the radium of the buffer around the identified property. It may not be greater than 500 meters, 1640 feet, or 0.31 miles.
|
|
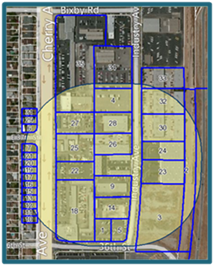
- Click on Show Buffer. The buffer appears on the map.
Tip: If you need to modify the size of the buffer, change the Buffer Distance. You may also change the Buffer Units. To remove the buffer from the map, click Clear Buffer.
- Click the Create List button
 to run the buffer search. Numbered search results display on the map. The results include all the properties inside the buffer and all the properties which touch the outline of the buffer but exclude the subject property. to run the buffer search. Numbered search results display on the map. The results include all the properties inside the buffer and all the properties which touch the outline of the buffer but exclude the subject property.
Note: If the buffer search intersects Custom Addresses (e.g., City Supplemental Addresses), the Search Results List includes those addresses.
Tip: To open the Search Results list at the bottom of the LandVision™ window, click the Results List icon in the formatting toolbar.
|

|
To remove the buffer from the map you can do so in two ways.
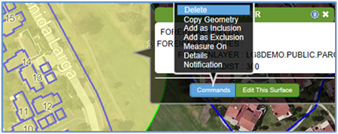
- Click on the outline of the buffer.
- Click on Commands at the bottom of the Buffer window.
- Click Delete in the menu and the buffer is removed from the map.
OR
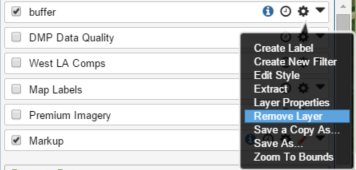
- Open Layers and look for the Buffer layer in the list
- Click on the Options icon
 and choose Remove Layer. and choose Remove Layer.
Note: Delete or Remove Layer removes the buffer, but does not delete the buffer search results. To delete the search results, perform the next steps.
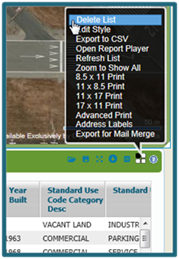
- Click the Options icon at the top right corner of the Search Results list.
- Click Delete List in the menu.
|
|
Address Labels
The Address labels feature takes the addresses lists in your results list and then converts them to mailing labels. When creating address labels, it's important to note the following:
- The subject property is not included
- All units, associated with a multi-unit parcel are included
- You have the choice to create address labels to the owner address, mailing address or both
Note: To initiate the address labels feature, the Results list must be open.
|
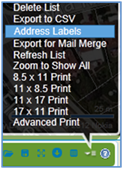
- With the Results list open click the Options icon and choose Address labels
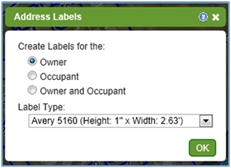
- The Address label's window opens and you have the option of choosing;
- The format of label
- Label Type from the dropdown menu
- Click OK and a window will open, prompting you to save a Word document with formatted labels.
- Open the Word document and print the labels.
|
|
Export for Mail Merge
Use Export to Mail Merge to export search results for customized mass mailings, including the creation of address labels, and the personalization of letters.
Tip: Export to Mail Merge is particularly suited for public notifications and direct marketing.
|
- Run a search and build a Search Results list that contains the properties you'd like to use in your mail merge.
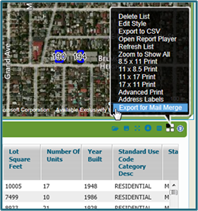
- Click the Options icon at the top right corner of the Search Results list.
- Click Export for Mail Merge in the menu.
- Your results will download to a csv file.
- Open and/or save the export file: MailMerge_[date].csv.
Note: A csv (comma-separated values) file can be opened in spreadsheet programs, such as Microsoft Excel®.
Note: You can export up to 2,000 search results to a csv file from the Search Results list. (The Search Results list may contain up to 5,000 search results.)
|
|  |
Related Information
|
|