|
Local Government Help > Documentation > Address Management
|
|
The process of Address Management is a critical activity for all local governments. GovClarity™ enables local governments to create a more comprehensive database of property information by adding and editing Custom Addresses (e.g., City Supplemental Addresses).
|
Address Management Overview
You can add Custom Addresses for properties and locations. Any object that requires a permit requires an address. Here are some common examples:
- Properties with Multiple Addresses: Strip malls are often in the assessors tax roll as one parcel and one address; however, for various reasons, such as permitting and public safety, this is not adequate to meet departmental needs.
- Non-property Areas: Electrical transformers, bus stops, fire hydrants, water meters, etc.
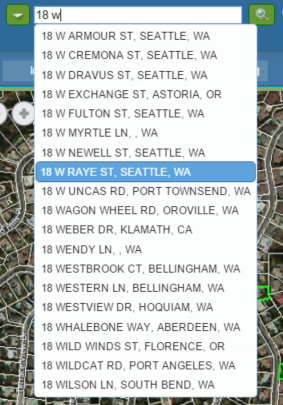
Tip: To search for a Custom Address, use the Locate Search field:
- Begin typing an address in the Locate Search field. The auto-complete menu displays.
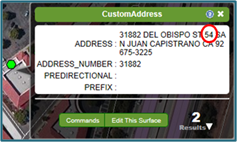
- Click a Custom Address. GovClarity™ zooms to the address and displays the Custom Address window. You can use the window to verify and edit the information that you entered.
- In the example to the right, 54 is the Unit Number of the Custom Address.
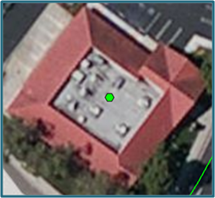
All of the Custom Addresses that you add in GovClarity™ display in the Custom Address layer as point icons when the layer is turned on.
- Click a point icon to open the Custom Address window.
- If a different window opens, click the Results down-arrow at the bottom right of the window. Click Custom Address on the menu.
|


|
Adding a Single Address
The Add Single Address command enables you to add a Custom Address and include the information in the address database.
Note: See the sections below, Adding Repeating Addresses and Adding an Address Group, to add more than one Custom Address to a parcel.
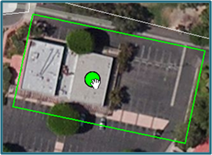
- Make sure that the Custom Address layer in the Legend is turned on and is identifiable.
- Click on the parcel to add a Custom Address. The Parcel Details window opens.
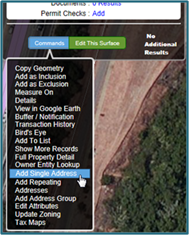
- Click the Commands button.
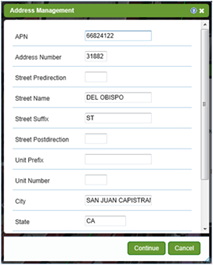
- Click Add Single Address on the Commands menu. The Address Management window opens.
- Enter information for the Custom Address:
- Street Predirection: For example, 1234 South Main St.
- Street Postdirection: For example, 1234 Main St. South
- Unit Prefix: See the section below, Required Unit Prefixes.
- Unit Number: Numeric value required
- Click the Continue button. A point icon displays.
- Click the map where you'd like to add the Custom Address. A confirmation message displays.
- Click OK.
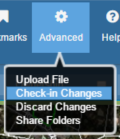
- Click the Advanced Menu icon
 on the Main Toolbar. on the Main Toolbar.
- Click Check-in Changes on the menu. A confirmation message displays.
Note: Click Discard Changes to cancel adding the Custom Address.
- Click OK.
See the section below, Editing Custom Addresses, to edit the attributes of a Custom Address.
|
|
Adding Repeating Addresses
The Add Repeating Addresses command enables you to add multiple Custom Addresses at specific locations, and include the information about each address in the address database.
Tip: Use the Add Address Group command to add a group of Custom Addresses without specifying each address or unit location. (See the section below.)
- Make sure that the Custom Address layer in the Legend is turned on and is identifiable.
- Click on the parcel to add Repeating Custom Addresses. The Parcel Details window opens.
- Click the Commands button.
- Click Add Repeating Addresses on the Commands menu. The Address Management window opens.
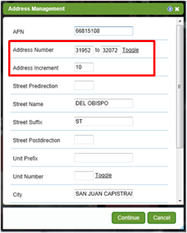
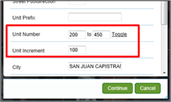
- Enter information for the Repeating Addresses:
Note: Click Toggle to switch between the Address Number and Unit Number fields.
- Address Number: The range of address numbers
- Address Increment: The increment for each address number.
- Unit Number: The unit number range
- Unit Increment: The increment for each unit number.
- Street Predirection: For example, 1234 South Main St.
- Street Postdirection: For example, 1234 Main St. South
- Unit Prefix: See the section below, Required Unit Prefixes.
- Unit Number: Numeric value required
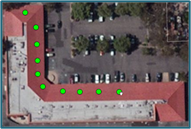
- Click the Continue button. A point icon displays.
- Click the map repeatedly where you'd like to add the Custom Addresses. After you add the last point icon, a confirmation message displays.
- Click OK.
- Click the Advanced Menu icon on the Main Toolbar.
- Click Check-in Changes on the menu. A confirmation message displays.
Note: Click Discard Changes to cancel adding the Custom Addresses.
- Click OK.
See the section below, Editing Custom Addresses, to edit the attributes of Custom Addresses.
|

|
Adding an Address Group
The Add Address Group command enables you to add a group of Custom Addresses without specifying each address or unit location, and include the information about the group in the address database.
- Add address groups to apartment buildings.
Tip: Use the Add Repeating Addresses command to add multiple Custom Addresses at specific locations. (See the section above.)
- Make sure that the Custom Address layer in the Legend is turned on and is identifiable.
- Click on the parcel to add an Address Group. The Parcel Details window opens.
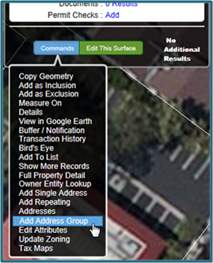
- Click the Commands button.
- Click Add Address Group on the Commands menu. The Address Management window opens.
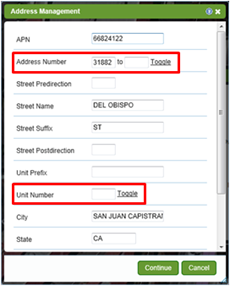
- Enter information for the Address Group:
Note: Click Toggle to switch between the Address Number and Unit Number fields.
- Address Number: The address number range
- Unit Number: The unit number range
- Street Predirection: For example, 1234 South Main St.
- Street Postdirection: For example, 1234 Main St. South
- Unit Prefix: See the section below, Required Unit Prefixes.
- Unit Number: Numeric value required
- Click the Continue button. A point icon displays.
- Click the map where you'd like to add the Address Group. A confirmation message displays.
- Click OK.
- Click the Advanced Menu icon on the Main Toolbar.
- Click Check-in Changes on the menu. A confirmation message displays.
Note: Click Discard Changes to cancel adding the Custom Addresses.
- Click OK.
See the section below, Editing Custom Addresses, to edit the attributes of Custom Addresses.
|
|
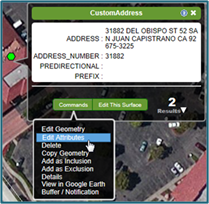
Editing Custom Addresses
To edit the information for a Custom Address:
- Search for a Custom Address. (See the section above, Address Management Overview, for instructions.) GovClarity™ zooms to the address and displays the Custom Address window.
- Click the Commands button.
- Click Edit Attributes on the Commands menu. The Edit Attributes window opens.
- Edit the Custom Address.
- Click Save.
|
|
Required Unit Prefixes
|
Apartment
|
APT
|
|
Building
|
BLDG
|
|
Basement
|
BSMT
|
|
Department
|
DEPT
|
|
Floor
|
FL
|
|
Front
|
FRNT
|
|
Hanger
|
HNGR
|
|
Lobby
|
LBBY
|
|
Lot
|
LOT
|
|
Lower
|
LOWR
|
|
Office
|
OFC
|
|
Penthouse
|
PH
|
|
Pier
|
PIER
|
|
Rear
|
REAR
|
|
Room
|
RM
|
|
Side
|
SIDE
|
|
Slip
|
SLIP
|
|
Space
|
SPC
|
|
Suite
|
STE
|
|
Stop
|
STOP
|
|
Trailer
|
TRLR
|
|
Unit
|
UNIT
|
|
Upper
|
UPPR
|
Related Information
|